Almost two years ago, I shared this
brief DIY tutorial on how to make a fleece tug toy. I still use that method to make most of the tug toys I use with my dogs, though I often vary it to make a spiral pattern instead of a square. This past weekend, I ended up going through five tugs for Koira. Some of them just got so nasty from the dirt and dog slobber combination that I threw them away. Others ended up being sliced up by Koira, who apparently has a new habit of chewing her tugs apart (for the first time in her life!).
Going through 5 tugs in a weekend made me want to learn a quicker way of making new tugs. A team mate of mine has a dog who goes through a tug about every 2-3 races, and she uses a four strand braid rather than a four strand weave like my previous tutorial. So this morning, I set out to teach myself how to make them, and decided to do a tutorial for you guys as well.
First step with any tug project is to cut up your fleece. I like to cut it into 4-5 inch wide strips, as it makes the final product beefy enough to give the dog a good grip. Using a straight edge and rotary cutter makes the entire process much faster, but you can of course use scissors as well if that is all you have. I cut up enough strips for at least a few tugs at a time so I don't have to pull the cutting mat back out all the time.
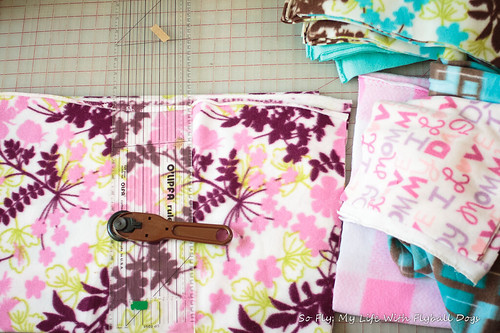 |
| Piles of fleece to cut |
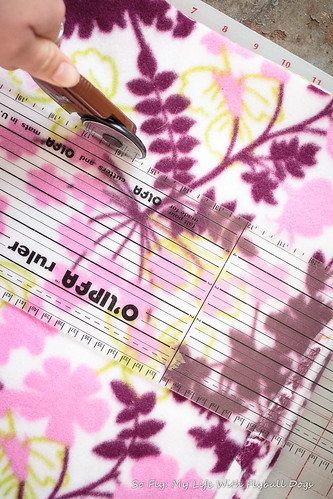 |
| Using a straight edge, rotary cutter, and cutting mat to cut fleece strips |
 |
| A pile of fleece strips once they are cut |
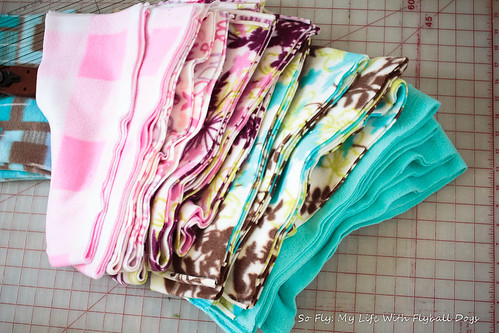
Then, separate out four strips. Each of these is just the width of a piece of fleece. I find it gives a decent length tug, but you can cut fleece lengthwise for longer tugs as well. I like to use two sets of two matching fleece strips. The picture below has two lengths of pink plaid fleece, and two lengths of a pink and dark pink valentine fleece. You can use any different colors, or all the same, I just find it is easier when learning to use sets like this.
 |
| Four strips of fleece; two are pink with writing, two are light pink plaid |
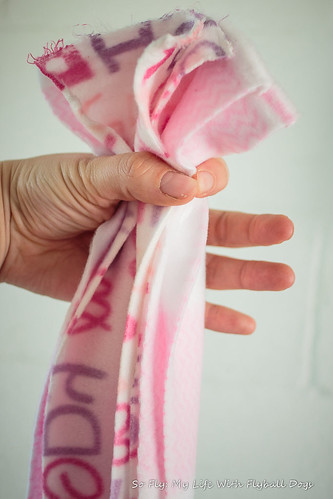
Next, tie a knot in your four strips as near to one end as possible.
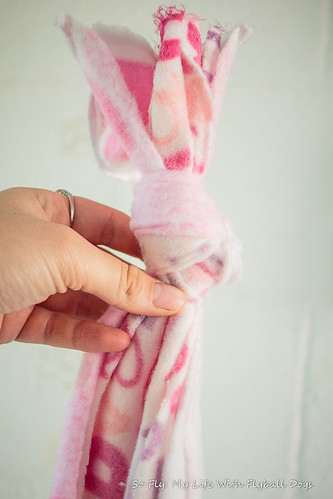 |
| Tie your knot in the end |
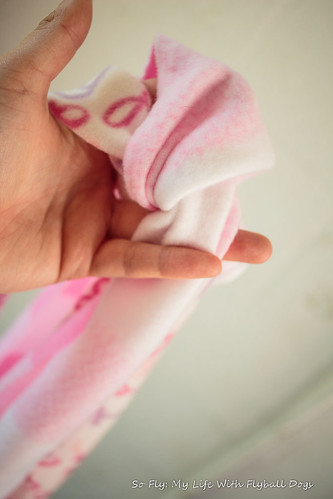
Then, separate out the different kinds of fleece so the matching strips are opposite each other. You may have to manhandle them a bit right next to the knot to get started, but it will look fine later.
 |
| You kind of have to force the strips into this position right next to your knot when starting out, but they will look fine once you start braiding them |
Now, you braid them all together. The easiest way for me to do it was to do each matching set at a time. I would take the top strip down towards me, across the knot, and to the right of the matching strip. Then take the other matching strip up towards the top and to the left of its matching strip. It should look something like this.
 |
| Each of the pink plaid strips flipped over. The one that was on the top is now on the bottom to the right, and the one that started on the bottom is now on the top to the left |
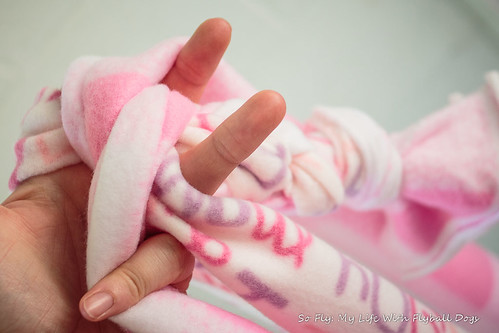 |
| Another view of the strips. This one shows how I like to separate the strips out with my fingers while braiding, and a bit of the started four strand round braid |
Then, cross the next pair, flipping the one on the right to the left and to the top of the other one, and then the one on the left flips to the right and on the bottom. You can pull them tight as you go or leave them loose. This one was done pretty loose.
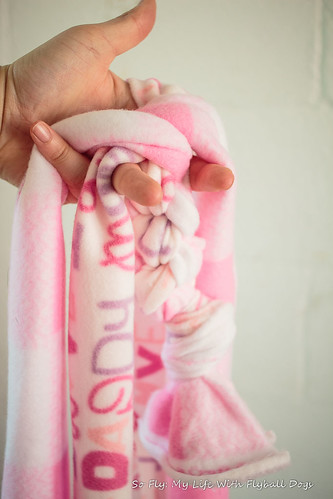 |
| I apparently didn't get any pictures of flipping the strips with writing on them, but it is basically the exact same thing, but side to side instead of top to bottom. |
Just keep repeating until you get close to the end of your fleece strips, then tie a knot in the end like you did at the beginning. And boom, fleece tug toy.
This is the first one I did. I pulled it tight sometimes, and sometimes was putting the fleece strips to the wrong side of each other. Which means the final product is a bit random in color and kind of lumpy. It is still perfectly useable, though.
 |
| You can see this one is a little wonky in size and pattern, but it is still just as usable. |
And then, here is all four tugs I was able to make using that pile of cut fleece you see up top.
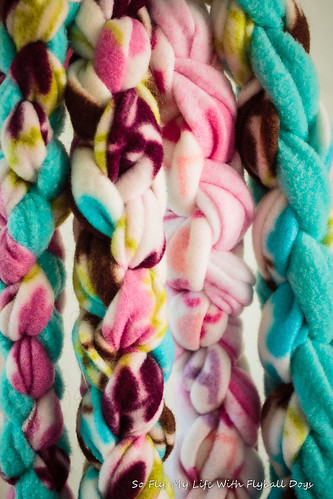 |
| Different width strips and different types of fleece, as well as how tight you pull the braid, will change how thick the final product is. |
 |
| Big handful of tugs. |
Hopefully, since we practice on mats and are running on mats at our next tournament, these four tugs will last for a little while at least. You can kind of get an idea of the length of them in this picture. New like this, each tug reached a bit above my waist from the ground. They will stretch out with use though as well, but they start out much longer than the four strand weave style tug in my previous tutorial. You can of course make them shorter or longer by starting out with shorter or longer fleece strips. I like the nice long tugs for flyball, since it gives my dog a large visible target when recalling.
That looks pretty interesting. I love to play tug of war.
ReplyDelete-Kootenai
You use them at the end of the exercise as their reward? They look pretty easy to make.
ReplyDeleteYes, the tug is the reward at the end of the flyball sequence. It both rewards them and gives the dog a defined place to go, giving the handler immediate control over their dog again.
ReplyDelete